
IMUGA Traveller Declaration: Step-by-Step Guide 2026
A complete walkthrough of the IMUGA form for the Maldives, with a field-by-field table, common errors, how to correct them and what to do if the QR never arrives.
Filing the Maldives Traveller Declaration on the IMUGA portal takes under ten minutes once you know what each screen wants. This guide walks through the whole flow — preparation, arrival or departure, passport data, flight, accommodation, health, review, submission and the QR code that lands in your inbox.
In 30 seconds: Open the official IMUGA portal within the 96 hours before your flight, choose Arrival or Departure, and complete five short blocks: personal details, passport, flight, accommodation and health. Check the review screen carefully — the passport number and the flight number cause most problems — then submit. A QR code arrives by email; save it offline. To fix a mistake, file a corrected declaration for that leg while the window is still open.
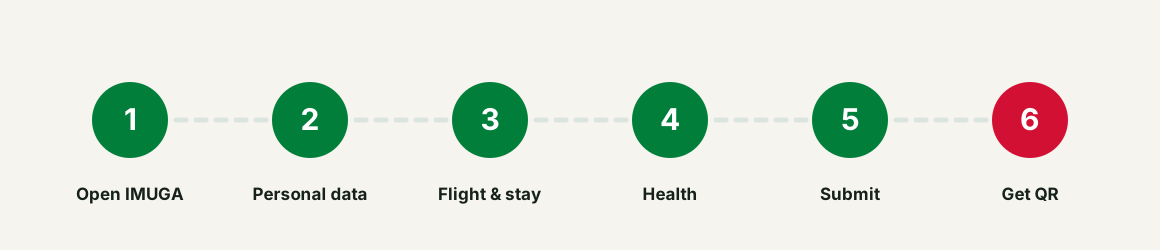
Step 1: Prepare before you open the portal
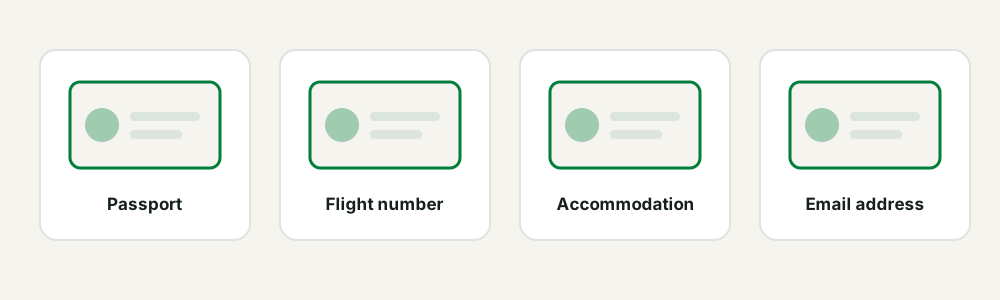
Sessions can time out, and re-typing a passport number at speed is exactly how errors get made, so gather everything first. Have these open on screen or on the table:
- Your passport, open at the photo page.
- Your flight confirmation, with the airline code and flight number visible (for example EK 652, QR 676, TK 730).
- Your accommodation booking — resort, hotel, guesthouse or safari boat — with the property name spelled as the operator writes it.
- The email address where you want the QR code delivered.
- For families, the same three documents for every traveller, including infants.
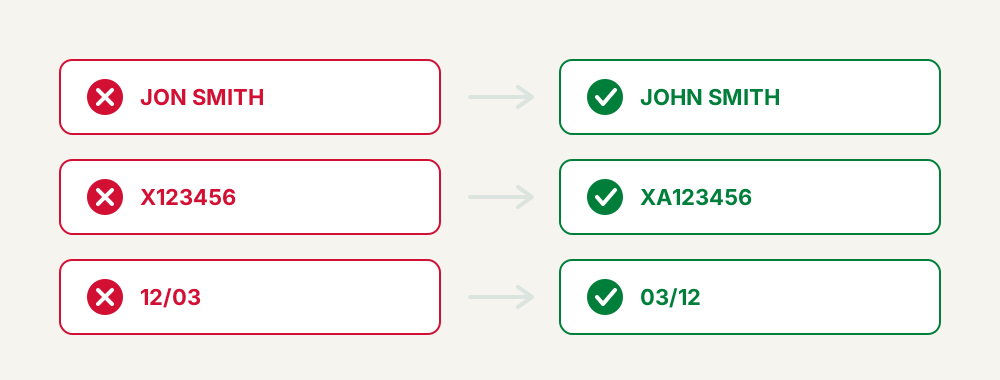
Expert tip: Type the traveller's name exactly as it appears in the machine-readable zone at the bottom of the passport page. Not the name on the airline ticket, not a shortened version, not an accented version if the passport prints it without accents.
If your passport expires within six months of your travel date, renew it before you file — the declaration will accept it, but the border may not.
Quick summary: Passport, flight number, accommodation name and a working email in front of you before the first click — that is the whole preparation.
Step 2: Open the IMUGA portal
Go to the official portal at imuga.immigration.gov.mv. Two practical points:
Use a browser you trust on a stable connection. The form is mobile-friendly, but a laptop makes the review screen far easier to read and reduces typos in passport numbers.
Check the address bar before typing anything. Search results surface a lot of look-alike sites, and the government portal never charges a fee for the declaration itself. Using an assistance service — ours included — is a legitimate choice, but know which site you are on and what you are paying for. See what the declaration costs.
Quick summary: Use the official IMUGA portal on a stable connection and verify the address before entering any personal data.
Step 3: Choose Arrival or Departure
The first real decision is the direction of travel. The portal presents Traveller Declaration — Arrival and Traveller Declaration — Departure as separate entries, and they are separate submissions with separate QR codes.
- Choose Arrival for the flight that brings you into the Maldives.
- Choose Departure for the flight that takes you out.
- Do both for every trip, each inside its own 96-hour window.
Picking the wrong one is a common mistake. The symptom is a form asking for details that do not match your situation — for instance where you stayed, when you have not arrived yet. Go back and switch direction rather than improvising answers. The differences are set out in the arrival and departure guide.
Quick summary: Arrival and Departure are two separate submissions; select the right one before you start typing.
Step 4: Personal and passport details
This block is where accuracy matters most, because immigration systems match your declaration against the passport chip. A single transposed digit breaks the match.
| Field | What to enter | Common mistake |
|---|---|---|
| Given name(s) | Exactly as in the passport | Adding a middle name that is not printed |
| Surname(s) | Exactly as in the passport | Dropping a second surname |
| Date of birth | As shown in the passport | Swapping day and month |
| Sex | As shown in the passport | — |
| Nationality | Country that issued the passport | Entering country of residence |
| Country of residence | Where you actually live | Entering nationality |
| Passport number | Character by character | Confusing 0 and O, 1 and I |
| Passport issue date | From the photo page | Leaving the field blank |
| Passport expiry date | Must allow 6 months validity | Using an expired document |
| Your working inbox | A typo that loses the QR code | |
| Mobile number | With country code | Omitting the country code |
Expert tip: If your surname contains a hyphen, an apostrophe or a character that the form rejects, mirror the machine-readable zone at the bottom of the passport page — that is the version border systems compare against.
Quick summary: Copy the passport exactly, digit by digit, and double-check the number, the expiry date and the email address.
Step 5: Flight details
The flight block links your declaration to a specific movement across the border.
You will need the airline, the flight number, the date of travel and the airport. Almost all visitors arrive at Velana International Airport (MLE) in Malé, but the portal also covers Gan (GAN), Maafaru (NMF) and Hanimaadhoo (HAQ).
Two situations cause confusion:
- Connecting flights. Enter the flight that actually lands in the Maldives, not the first leg from your home city. If you fly London–Doha–Malé, the flight you declare is Doha–Malé.
- Dates across midnight. Long-haul arrivals often land the day after departure. Use the local date of the landing, as printed on your ticket for that segment.
For departure declarations the logic reverses: enter the flight that leaves the Maldives, and its local departure date.
Quick summary: Declare the flight that crosses the Maldives border — the arriving or departing segment — with its own local date.
Step 6: Accommodation
This block tells the authorities where you will be among the islands, and the options differ in what they ask for.
- Resort island. Enter the resort name and the atoll. Most resorts print both on the booking confirmation and on the seaplane or speedboat transfer voucher.
- Hotel in Malé or Hulhumalé. Enter the hotel name and the island. This is the usual answer for a short pre- or post-flight overnight.
- Guesthouse on a local island. Enter the guesthouse name and the island name. Local island stays are increasingly common with travellers who are not on a resort package.
- Safari boat / liveaboard. Enter the vessel name. Diving itineraries move between atolls, so the boat is the reference point, not a fixed island.
If your trip splits between two properties, declare the first place you will stay after landing and keep both confirmations with you.
Quick summary: Give the exact name of your resort, hotel, guesthouse or safari boat, and declare the first property of the trip if you are moving between islands.
Step 7: Health declaration
The health block is short: whether you currently have symptoms, and your recent travel history. Answer honestly — these are screening questions, not a test you can fail, and a "yes" simply means an officer may follow up on arrival. For children, a parent or guardian answers on their behalf, and nothing here normally requires a medical certificate.
Quick summary: Answer the short health questions truthfully; a "yes" is not a problem, an inconsistency later is.
Step 8: Review and submit
The review screen is the most valuable part of the whole process and the one most people scroll past.
Check, in this order:
- Passport number — character by character against the document.
- Full name — spelling and order of surnames.
- Flight number and date — matching the segment that crosses the border.
- Direction — arrival or departure, as intended.
- Email address — because everything downstream depends on it.
- Accommodation name — matching the booking.
Then submit. The portal confirms on screen. Do not close the tab until you have seen that confirmation, and if you can, screenshot it.
Quick summary: Verify passport number, name, flight, direction and email on the review screen before submitting — that is where errors are cheapest to fix.
Step 9: Receiving the QR code by email
Within minutes of submission, the QR code arrives at the address you entered. Each traveller receives their own code for each direction of travel.
What to do with it:
- Save it offline. Screenshot it, add it to your phone's wallet or a favourites album.
- Print a copy. Paper does not run out of battery on a seaplane transfer.
- Keep it accessible at check-in. Airline ground staff ask for it before issuing boarding passes.
- Do not mix up family members' codes. Label the screenshots with names.
Full detail on scanning problems and reissues is in the QR code guide.
Quick summary: The QR arrives by email in minutes; save it offline, print it, and keep each traveller's code clearly labelled.
Step 10: Fixing mistakes and missing emails
Two problems account for almost all post-submission support requests.
You spotted a mistake. If the error is in your passport number, name, flight or accommodation, the practical fix is to submit a corrected declaration for that leg while the 96-hour window is still open, and travel with the newest QR code. If the window has closed or the change is complex, contact Maldives Immigration through the portal's support channel — or ask an assistance service to handle it.
The email never arrived. Work through this list before assuming the submission failed:
- Check the spam and promotions folders, and any corporate email filter.
- Confirm the address you typed — a single wrong character is the usual cause.
- Wait a full hour before concluding anything; delivery is usually fast but not instant.
- Check whether your inbox is full, which silently bounces mail.
- If nothing works, file again with a verified email address, well inside the window.
See also the most common declaration mistakes and what happens if you skip the declaration.
Quick summary: Correct errors by refiling that leg inside the window; if the email is missing, check spam, verify the address and refile with time to spare.
Key Takeaways
- The IMUGA Traveller Declaration takes under ten minutes if you prepare the passport, flight number, accommodation name and email address in advance.
- Select Arrival or Departure deliberately — they are separate submissions with separate QR codes and separate 96-hour windows.
- Copy passport data character by character; the passport number is the field that causes the most support requests.
- Declare the flight that crosses the Maldives border, not the first leg from your home city.
- Accommodation can be a resort, hotel, guesthouse or safari boat; use the exact name from the booking.
- The QR code arrives by email within minutes — save it offline and print it before you fly.
Frequently Asked Questions about the IMUGA form
How long does the IMUGA Traveller Declaration take?
Around five to ten minutes per traveller if you have your passport, flight confirmation and accommodation booking to hand. Families take longer because each person needs their own record.
Can I fill in the IMUGA form on my phone?
Yes, the portal works on mobile. A laptop is still easier for the review screen and reduces typing errors in passport numbers, so use one if you have the choice.
Which flight number do I enter with a connection?
The flight that actually enters or leaves the Maldives. On a London–Doha–Malé itinerary you declare the Doha–Malé segment, using that segment's local date.
What do I put if I stay on a liveaboard safari boat?
Select the safari boat option and enter the vessel name as the operator writes it. Diving itineraries move between atolls, so the boat is the reference rather than a fixed island.
I am staying at two hotels. Which one do I declare?
Declare the first property where you will stay after landing, and carry both booking confirmations in case an officer asks about the rest of the itinerary.
I made a typo in my passport number. What now?
Submit a corrected declaration for that leg while the 96-hour window is still open and travel with the newest QR code. If the window has closed, contact immigration support through the portal.
The QR code email never arrived. What should I do?
Check spam and promotions, confirm the address you typed, and wait a full hour. If nothing appears, file again with a verified email address, leaving time inside the window.
Do I need to print the QR code?
It is not strictly required, but it is strongly recommended. Phones run out of battery and airport wifi is unreliable, and you will be asked for the code at check-in and at immigration.
Can one person submit for the whole family?
Yes. An adult can complete a group submission from a single account and email address, but each traveller still generates an individual declaration and an individual QR code.
Is there any fee on the IMUGA portal?
No. The declaration has no cost on the official portal. Only optional assistance services, which review and file on your behalf, charge for their work.
Last updated: July 2026. Immigration rules can change; always check the current requirements on the official Maldives Immigration portal before you travel.